Niki and I enjoy pretending that we’re coffee snobs.[footnote]I mean this in the most loving way possible. Snob is a term of endearment here.[/footnote] We’re not. A few things disqualify us:
- We occassionally drink our coffee with cream and not black. Strike 1.
- We most regularly brew Eight O’Clock coffee, Hazelnut variety. Not fair trade, not locally roasted, and flavored. Strike 2.
- We most often brew coffee via a standard, (yet convenient) drip coffee maker.[footnote]We love this coffee maker. It has no pot, so it’s most ideal if you have a sprayer attached to your sink to add water, but being potless is awesome.[/footnote] Strike 3.

Now, I’ll make a case for us being moderate coffee snobs:
- We own an AeroPress and a French Press (but the latter is currently collecting dust).
- We use a burr grinder instead of a blade grinder (a cheap one, but it gets the job done).
- I drink close to half a pot of coffee a day.
- Starbucks isn’t our favorite variety of java.
I hope that gets us at least partially into the graces of those who are true coffee connoisseurs.
At any rate, I’ve searched around the Interwebs a fair amount to find a “Starter Guide to Coffee Snobbery” and I’ve come up short. Since I don’t fully qualify for full-on coffee snob status, I’d say I’m in a good position to take a stab at helping others climb the latter to fancy coffee drinking.
Let’s go.
Using an AeroPress to Brew Coffee (or The Starter Guide to Coffee Snobbery)
There are a few things that you’re going to need to get started. We’ll start with the most essential pieces of equipment for the brewing method, on down to the less critical items, but nonetheless a full round-up of startup equipment with costs and suggestions.
For brewing: The AeroPress
When it comes to brewing methods, there are lots of exotic options. We prefer the AeroPress for a number of reasons:
1. It’s cheap. Dirt cheap. Cheaper than a coffee pot at Wal-Mart cheap. For $30 you can get an AeroPress (the original, and essentially the only model) which includes a fairly crappy nylon carrying case and enough filters to keep brewing until Jesus comes back.
2. It’s (fairly) easy to use. No bunson burners, no fancy acrobatics. Just a plastic plunger with a few pieces and all the tools you need to work it.
3. It’s uber portable. I almost brewed a cup of coffee on an airplane with this thing. For the travelers (which we are) and campers (which we are most certainly not) or just your typical nomad or minimalist, it’s light and easy to take the AeroPress with you wherever you’re going. As long as you have access to hot water, you’re ready to brew.
For taste: Good coffee
If you start with crappy coffee, you’ll end with crappy coffee, no matter how fancy your process is. Look for a local roaster in your area, because it’s cool to shop local and it’ll be tastier. You can try subscription services like Tonx or Misto Box to test out some different coffees for more than it’ll cost you if you get beans near you, but with less hassle. I’m still experimenting in the bean department and I honestly can’t make any great recommendations, so try stuff out.
For grinding: A burr grinder
You should buy whole bean coffee, because if you buy it pre-ground, it’s not as fresh. How then shall you grind? I’m glad you asked. There are two options.
Blade grinders (the cheapest grinders, normally under $20) have one blade that whips around like Willow Smith with uneven chopping and essentially no grind tuning. Blade grinders don’t give a consistent grind and they are overall pretty shoddy. Don’t waste your time with them.
Burr grinders are expensive. We have a “cheap” burr grinder that was around $50 (more than some people will spend on coffee this year) but it is adjustable and it’s been working for a few years. I’m certain we’ll be digging a shallow grave for it soon, because it sounds more like a zombie than a grinder now.
When it finally kicks the bucket, we’ll likely go with this $40 Porlex hand-crank grinder since we’ll be overseas and American outlets do not play nicely with European ones. It also makes brewing a cup of coffee while traveling even easier. If you don’t want to buy a grinder, you could get beans and have them ground at the shop or store where you buy them, but it’s not the best situation, because in an ideal world you’d grind the beans right before you brew them for better flavor and freshness. Here’s the grinder we use, and here is a $100 grinder a few coffee pros I respect recommend.
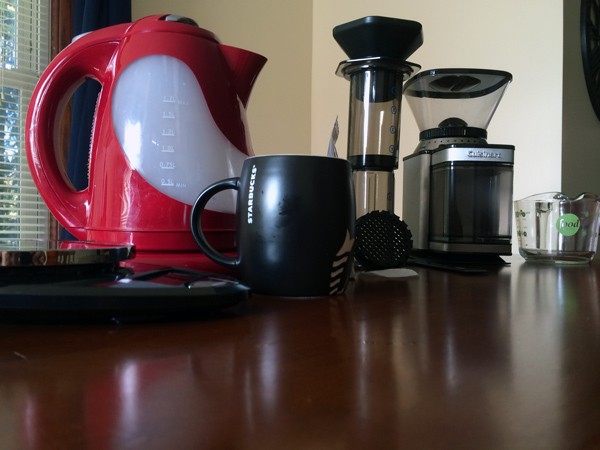
For heating water: An electric kettle
I’ve long heated up water to boiling on the stove in a simple pot (like a neanderthal). It’s a first-world hassle. We bought a cheaper $25 Hamilton Beach electric kettle and it’s much less effort to make coffee in the AeroPress this way. We can’t heat it to a certain temperature like you can on fancy-pants electric kettles, but again, we’re just at the first step of our thousand-mile journey into coffee utopia. We’re not sold on spending $100 on a stinking kettle yet. Again, you don’t need a kettle and you can totally hack it by boiling water on the stovetop/an open fire, which we (humans) did for a long time.
For exact measurements: A kitchen scale, measuring cup and stopwatch
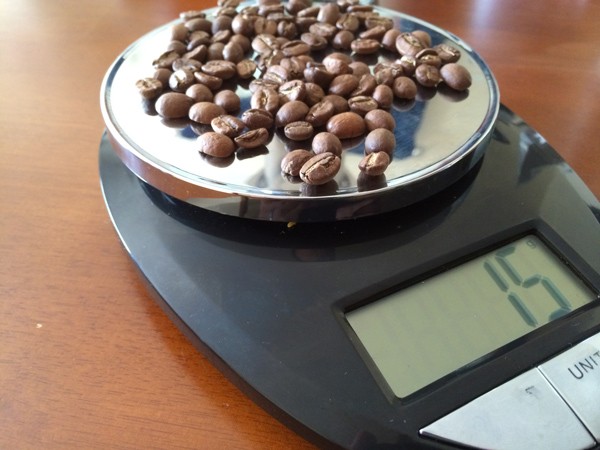
It’s nice to have a kitchen scale (smaller and more precise than the one you put bodies on) so you can perfect your brewing recipe down to the amount of grams you’ll need, but it’s not necessary. You can use the included scoop that comes with the AeroPress (which is about 3x the size of an average coffee scooper you use for a drip coffee pot), and that will get you pretty darn close to what you need if you follow the directions for 1 and ? scoops. Many people recommend weighing beans out to around 15 grams for a cup of AeroPress. I haven’t crafted a recipe yet because I’m still learning, so I just listen to people smarter to me in this category (of which there are many). Again, it’s negotiable, but lots of people like this EatSmart scale, which we snagged this summer. Niki uses it for cooking and sometimes I like to weigh my head to see if my brain is getting bigger. I’m kidding, but the scale can handle up to 11 pounds of cranium (or any other material). Another negotiable item here, but you asked for the details, so I’m trying to get us all the way there.
A measuring cup[footnote]preferably glass, since we’re dealing with hot water and I hear that stuff can melt plastic[/footnote] with metric units on it would be helpful too. Don’t buy a fancy one, and don’t buy a metric one if you don’t have it, just convert the units for Pete’s sake.
Having a stop watch app on your phone (or a real stopwatch if you’re a gym teacher) will be helpful too. Any feature phone or smartphone will certainly have this.
To drink from: A coffee cup with a wide mouth
If you were thinking about drinking your AeroPress coffee out of a tall and skinny tea cup, THINK AGAIN. You’ll need an average to large-sized coffee mug so that the AeroPress rests well on the mug, so that the mouth of the AeroPress doesn’t hang over the lip of the mug, creating a coffee mess all over your countertop.
Total cost for all the gear mentioned: $30 AeroPress, $50 blade grinder, $25 electric kettle, $25 kitchen scale = $140
AeroPress only, grind beans in store and heat water on stove: $30
The Process: Brewing your First Cup of AeroPress Coffee
Do you still have a pulse after a 1,000+ word introduction just for the gear? Great, let’s make it snappy on brewing your first cup of joe via AeroPress. I’m really going to hold hands here, because I felt pretty lost my first time down this path of AeroPressing, but I’ll simplify the recipe below the very detailed instructions so you can just reference it once you get the hang of things. I’m also organizing for efficiency so it doesn’t take half a day to make your morning coffee, because then everyone will suffer. Make sure you have all the (necessary) equipment and items mentioned above before you start the process so you aren’t scrambling mid-brew. Again that includes:
- AeroPress body (chamber and plunger), T-stir stick, plastic cap, filters and funnel (if you are shaky on the pour)
- Electric Kettle (or pot to heat water)
- Burr grinder
- Coffee beans
- Kitchen scale
- Glass measuring cup
- Stopwatch (app)
- Wide-mouthed coffee mug
- Water
- Patience (not pictured)
It’s probably a good idea to read through these ridiculously detailed instructions before starting, because precise timing is important, and that’ll be tough to do on your first read through.
- Fill up your electric kettle to around .5 liters (or 1 liter if you plan on making two cups for you and a friend/spouse/stranger) and turn it (the kettle) on. Let it magically heat up water while you continue to dance this coffee dance. (Be sure you’ve followed instructions for getting the plasticky taste out of the kettle if you bought the Hamilton Beach one we did. See instructions in box)
- Pull out your mug du jour, kitchen scale and beans. Measure 15g of beans onto your scale.
- Dump beans into grinder on a setting between fine and medium, but closer to fine. This will take some tweaking, so feel free to start anywhere and try different settings until you find the right one for you and your grinder (if you change grinder to baby in that last sentence, it feels a little like a parenting guide; however, I do not recommend dumping beans into your baby.).
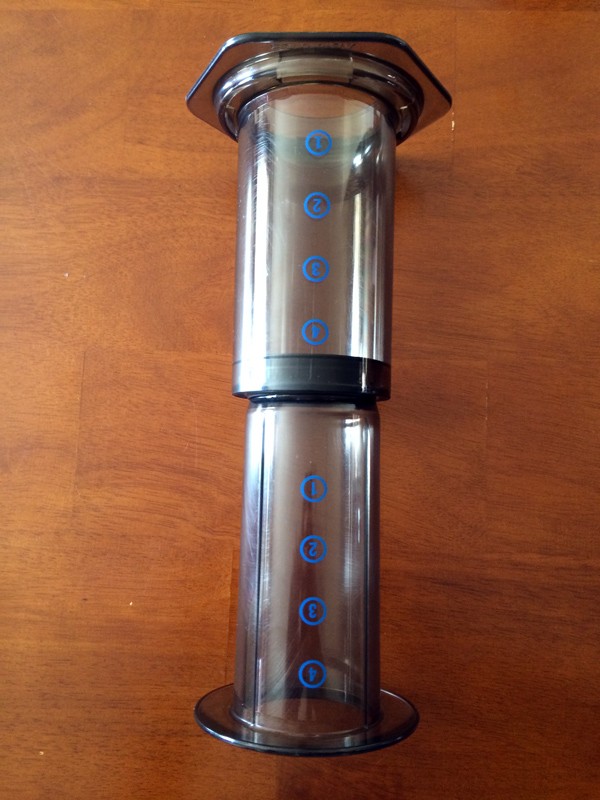
- Pull out your AeroPress. Wet the side that has the rubber plunger on it, and then insert the plunger into the plastic tube through the top hole (closest to the number 4 is). Let the plunger rest just below the #4, but enough so that none of the rubber is outside of the plastic tube).
- Set the AeroPress down so the round, flat plastic lip is on the counter and the hexagon shape is upward. We are using what’s called the i nverted method, which I prefer, which just means we’re using the AeroPress upside down, but it keeps the coffee from seeping out as it’s brewing for a more accurate brew, in my opinion.
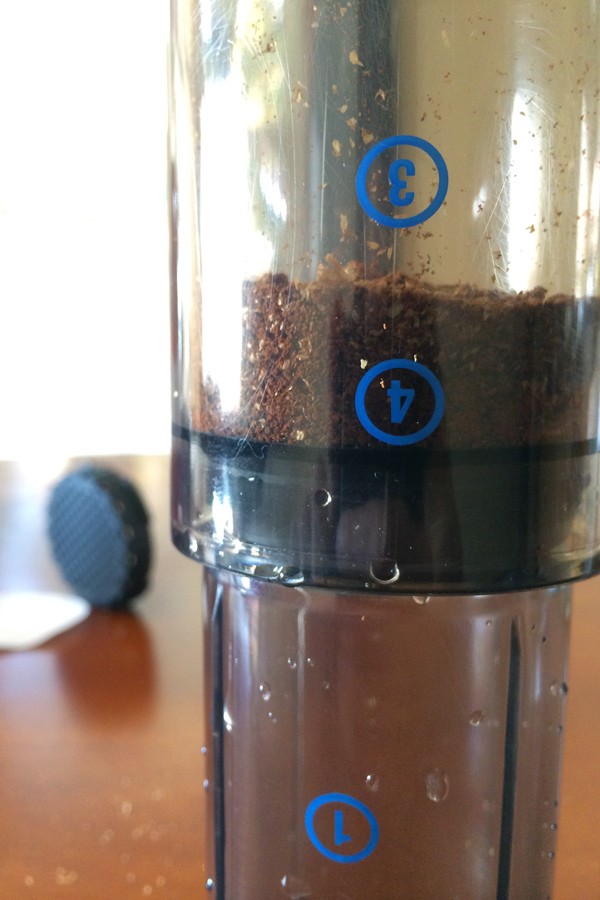
- Add your coffee grounds to the opening in the AeroPress so they rest on the plunger and go up toward the jagged edge of the AeroPress where the cap and filter will go. Shake the AeroPress a bit to get the grounds to even out.
- Add the 75 grams of your recently finished brewing hot water to a measuring cup.
- Start your timer and add the 75 grams of water to the AeroPress and coffee grounds and let it set for 30 seconds.
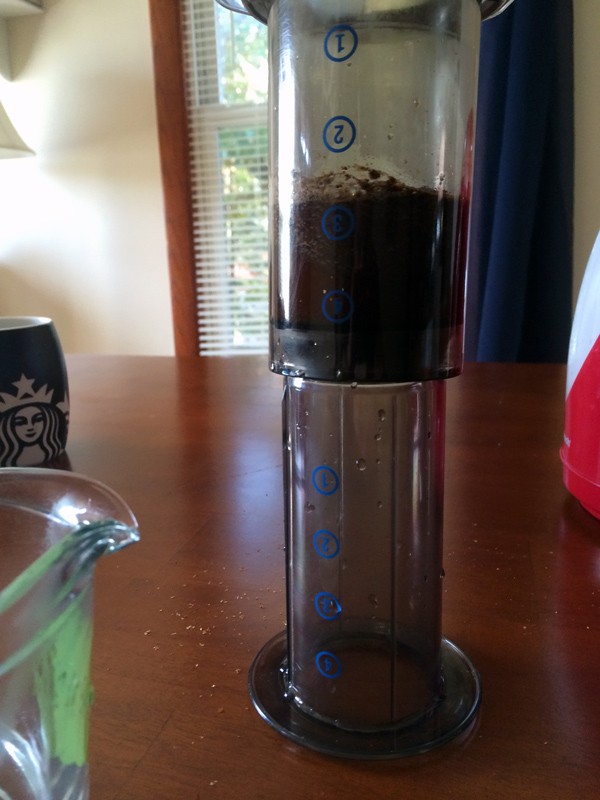
- Add an additional 175-200 grams (more water is a weaker cup, which I prefer) of water to your measuring cup and then the AeroPress and let the brew set for another 60 seconds, (now up to 1 and ½ minutes total). Stir the water and grounds with the provided plastic AeroPress T-Stick for 10 – 20 loops, or until the coffee grounds are well mixed with the water.
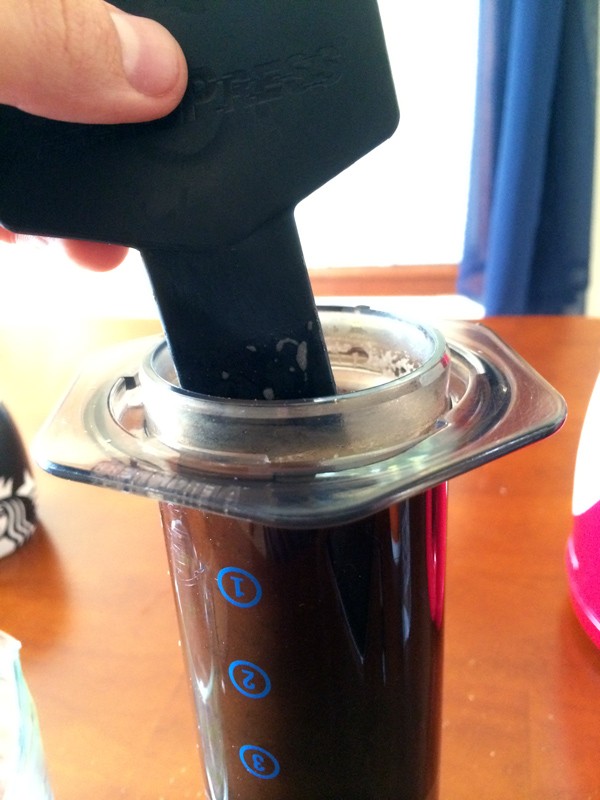
- Add the plastic cap with a paper filter inside of it to the side of the AeroPress currently facing upward. Screw the cap on so that it rests under the plastic lips around the edge. Many people recommend wetting the paper filter–I don’t think it makes much of a taste difference, but it’s easier to get it to stay in the cap if it’s wet.
- Swiftly but with precision, turn the AeroPress upside down with the plastic cap on the inside of the coffee cup. If you move too slowly, coffee will start to emerge all over you and your kitchen. If you move to fast and miss your mug, same problem. Once you have it on there, put both hands on the top of the AeroPress and gently begin to press down. This should take less than 30 seconds, but there is a ton of pressure, so don’t push down too quickly or you could break everything (really).
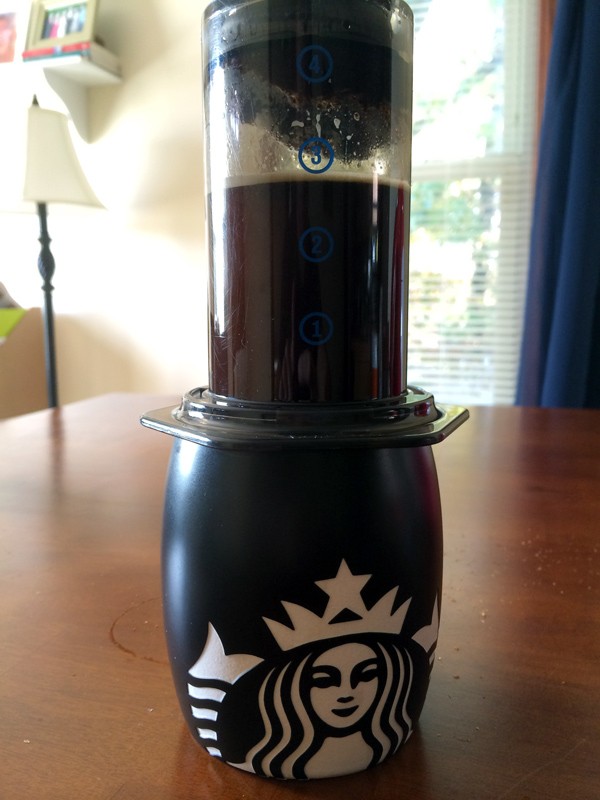
- Remove AeroPress and place in sink (because it’ll be a bit drippy) and enjoy your extra-freshly brewed cup of coffee.
The Short Version
- Heat water.
- Measure and grind 15 grams of beans on a fine to medium grind.
- Add grounds to AeroPress in the inverted position.
- Start stopwatch and add 75 grams of just-off boil water to mixture.
- After 30 seconds, add an additional 175-200 grams of water to AeroPress and stir until well mixed.
- After a total of 1 and ½ minutes, press coffee into mug slowly and enjoy delicious coffee.
If you’re looking for a more advanced guide with the history of the device, tips, cleaning techniques and more check out the Coffee Chronicler’s Ultimate Guide to the Aeropress.